
My back is messed up. No use in going over why this happens to me periodically. I will accept that it is for me to deal with even though the initial cause was out of my control. Yes, I know what I am supposed to be doing to avoid a recurrence of this pain–yet it continues to plague me. I should avoid sitting for long periods of time in folding chairs. I should get up at least once an hour and walk around. I should not sit hunched over my computer for 6 hours straight. I should lose weight. I should practice yoga more consistently; the list goes on and on.
I understand that other people deal with chronic pain and have much more intense experiences than the few weeks I am disabled by sciatica pain and random back spasms. Perhaps they have ways to deal with it other than the ice packs, ibuprofen, bedrest and stretching exercises I use as my main healing techniques. Mostly though, I wait and DISTRACT myself with work, sleep, music, random mind puzzles, and listening to inspirational videos and other resources online.

I meant to write a really uplifting post this month, I procrastinated as long as I could waiting for the last hour of the last day to post this. And having finally gotten something written, it now seems like I have devolved into what feels like whining to me. So, in order to add something interesting and positive, I share an excerpt from my old blog “Pig in the Clouds” where I describe how to make little refrigerator magnets.
May you all have happy spines. That is what I want for myself right now, so I wish it for you too.

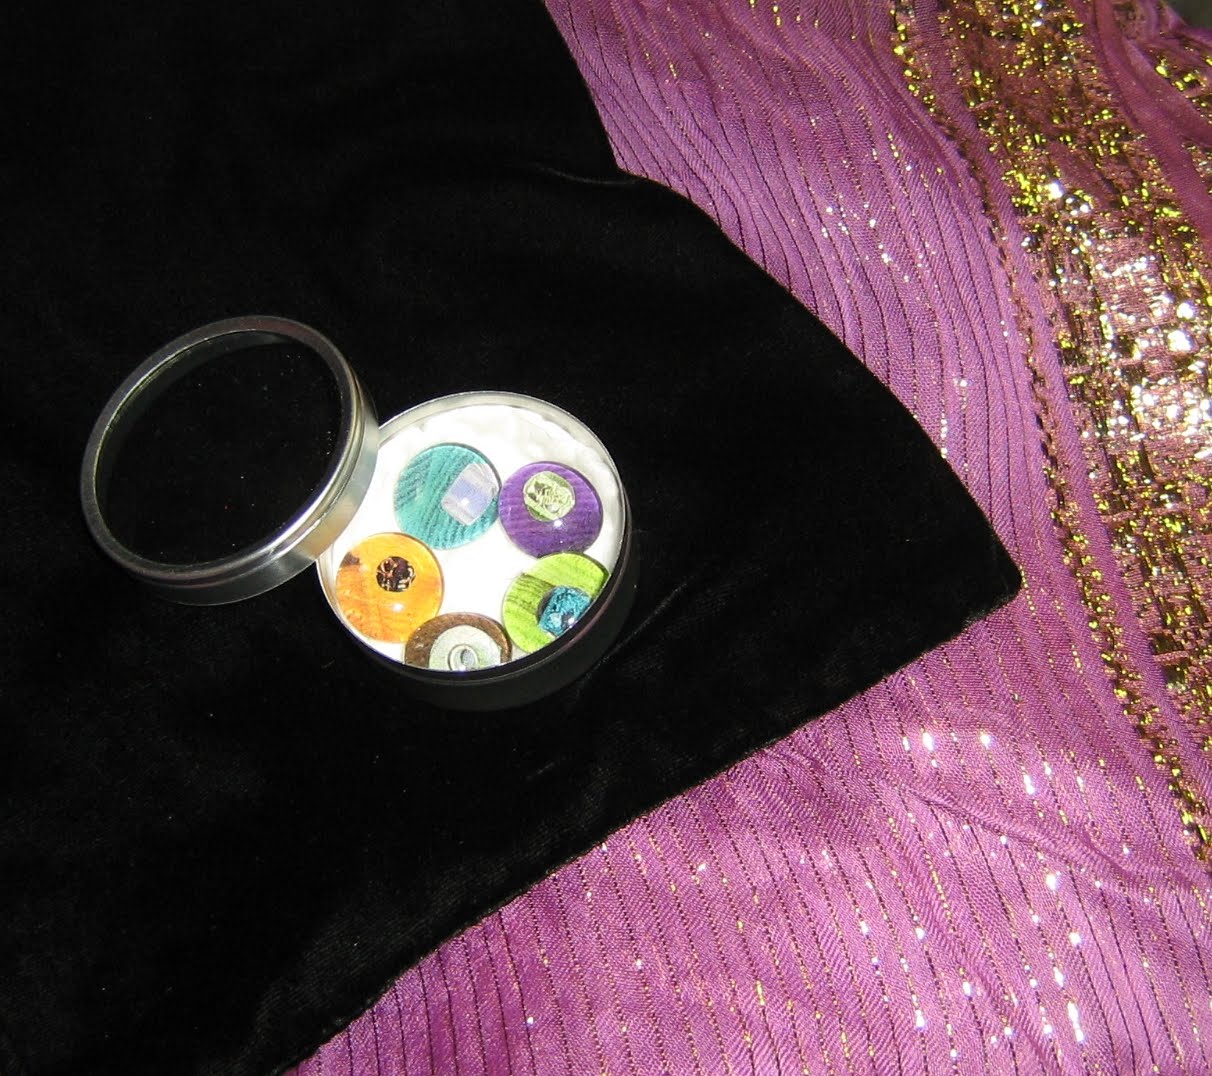
Mini Bubble Magnet Sets
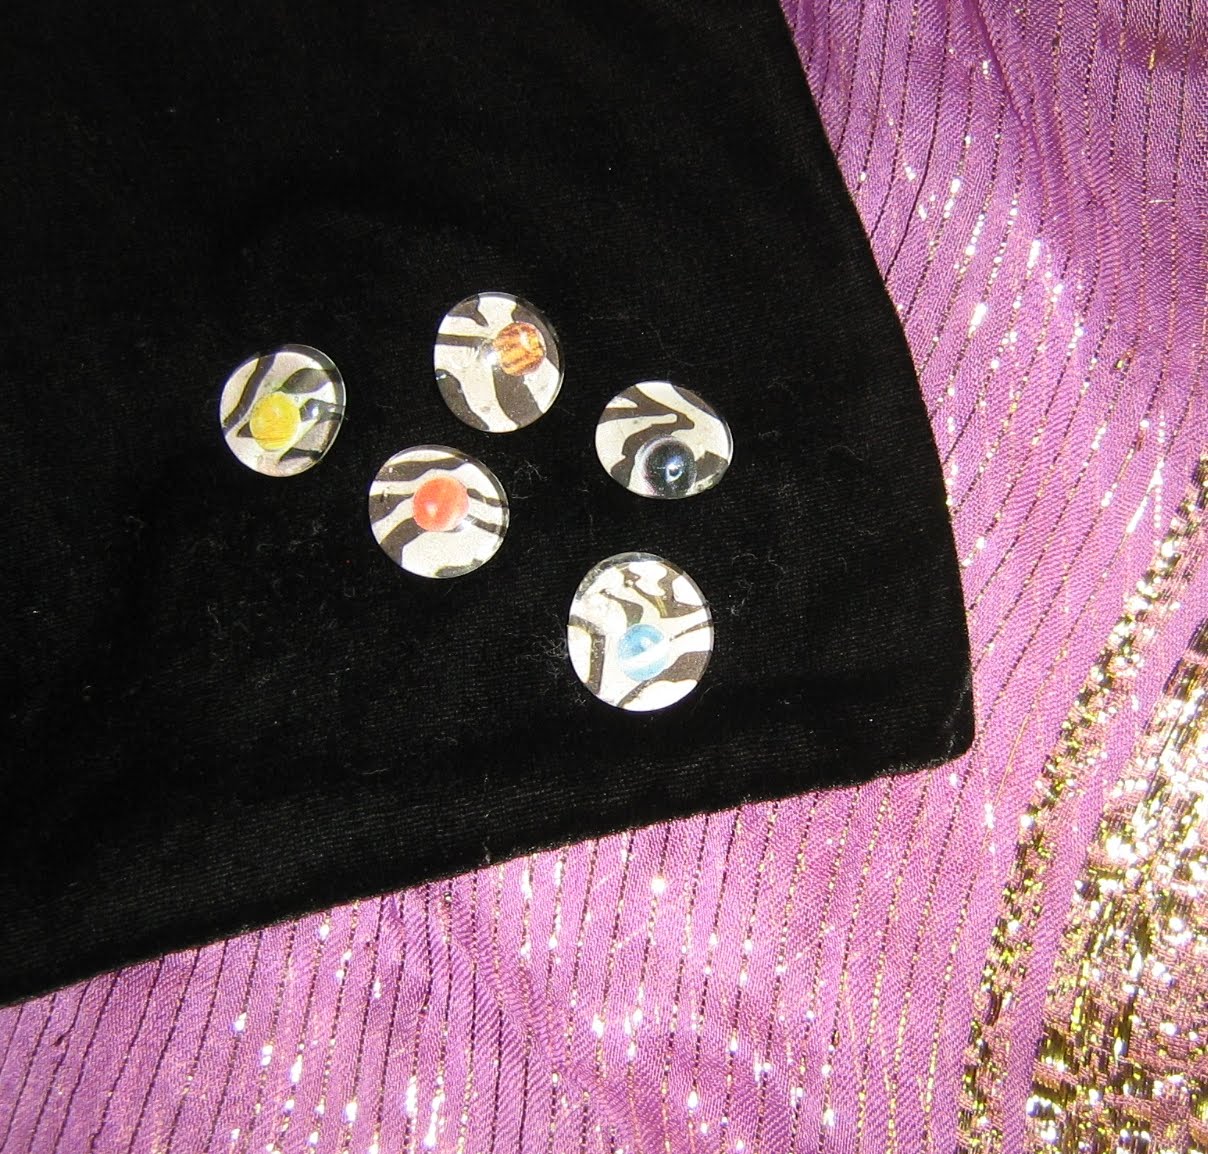
 The mini-bubble magnet sets are done! I thought about adding little embellishments to the tops of these small round bubble gems, but I just liked them WAY too much the way they were–simple, geometric, but still holding on to an organic energy. Glass and paper make me very happy.
- As I was creating these latest mini gem sets I attempted to photograph some of my process. This was not as easy as I had imagined; balancing the camera; keeping glue off the lens; adding silicone and getting shots before it set; and of course making sure the magnets did not get too frisky and kiss before the adhesive set! (If this happens I have to pry them apart, clean everything off and start the adhesion part over.)
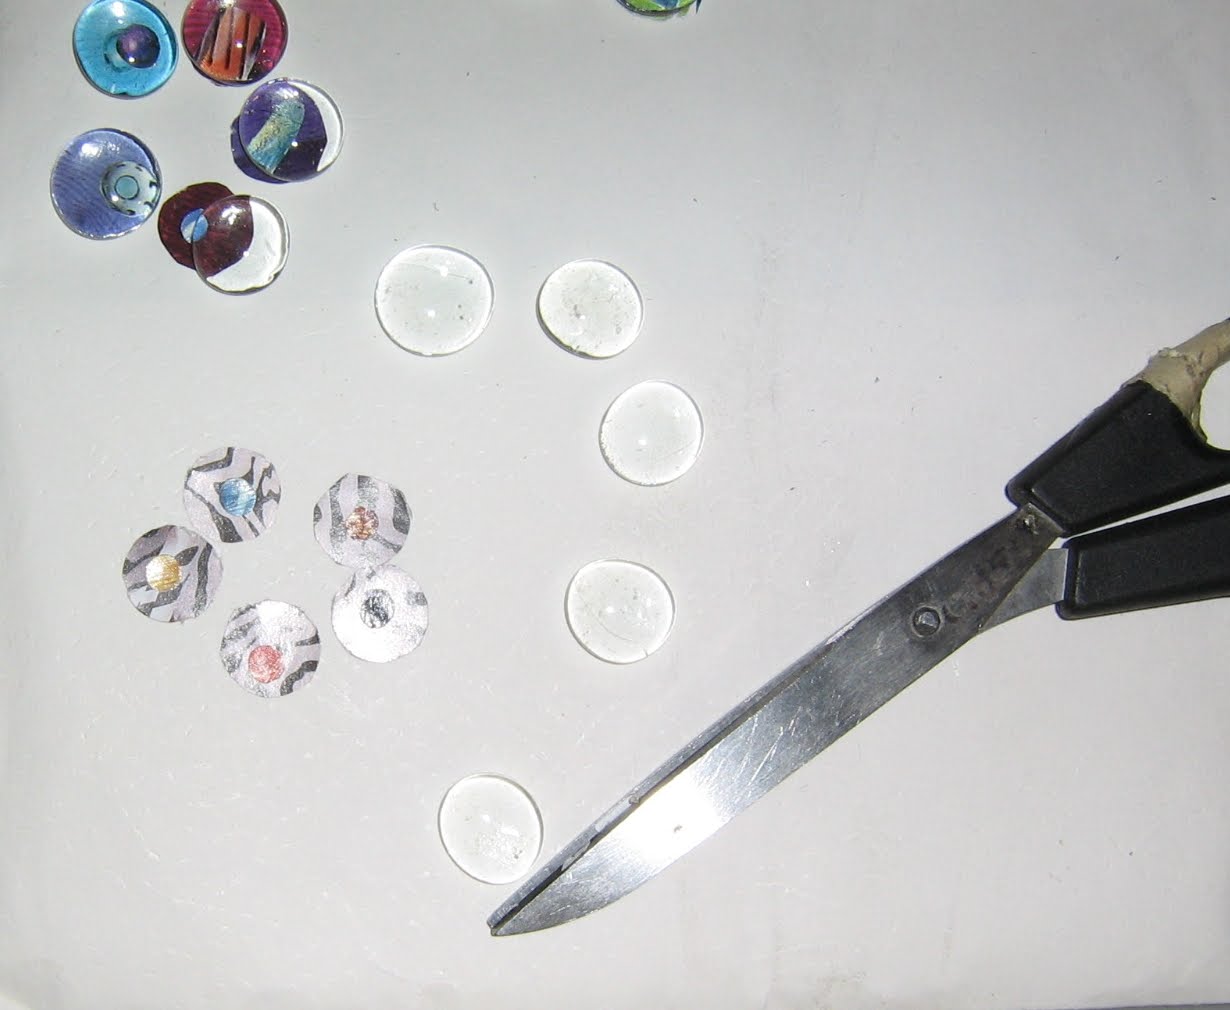
- So, after I clean my clear gems, I don’t have photos of any of this part, the first thing I do is pick 5 pieces that will fit nicely in a tin. This will be one “set”.
- Next, I find a background image I like. I am generally attracted to textiles and other things with a bit of light, shadow and texture. I trace each of the 5 gems and cut out the circle-like shapes.

- Then, I look for tiny images that will “float” on top of the background and I cut those out.
- For my latest sets I chose pictures of beads and glass shapes. I love photos of glass – almost as much as I love glass itself. This may stem from being surrounded by glass globes and other glass objects when I was a child, hanging out at my father’s industrial design studio after school. Or maybe in an alternate universe I am a glass artist creating melted pieces in my kiln. (I say alternate universe because I do not think I have the arm or lung strength for that job in this life.)

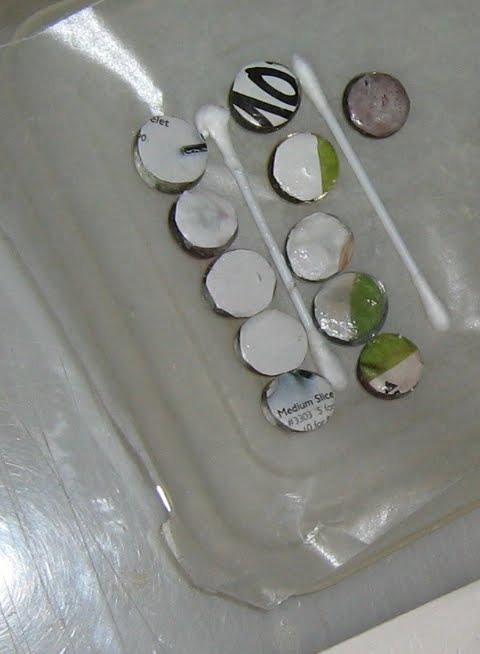
- After I have designed a set, I apply acrylic medium to the back of each gem. I use a cotton swab because I have found too many paintbrush hairs imbedded in previous pieces and they are a pain to remove after the acrylic has dried.
- In this medium puddle I place the “floater” images FACE DOWN. Remember. you are working in reverse and when the medium dries it will be clear. Look closely, you may be able to see that there is a little piece of blue paper near the center of the photo (directly below) where my fingers are encrusted with dried glue.
- You can continue adding things upside down, keeping in mind that the things you lay down first will appear on top of the things you apply afterwards. (I meant to add some fibers but could not locate them this time, oh well, will add those to the next sets I make.)

- When you are done adding your smaller images, coat the front of your paper background–the somewhat circle-shaped piece–with a little medium (it may curl, do not worry, it will relax after the medium has soaked in a bit.)
- Place the paper circle on your gem (front-side down just like everything else) and rub it gently with your finger, you can add a small amount of medium to the back of the paper now if it makes it easier for you to rub. Turn the gem over and look for any bubbles of air that may be trapped between the glass and the paper and rub them out towards the edges. Do not be concerned if medium oozes out too, you can wipe it away with a slightly damp cloth, or wait until it is dry and scrape it off the glass with your fingernail. After you have rubbed out all the bubbles, apply a full coat of medium to the back of the paper to seal it.

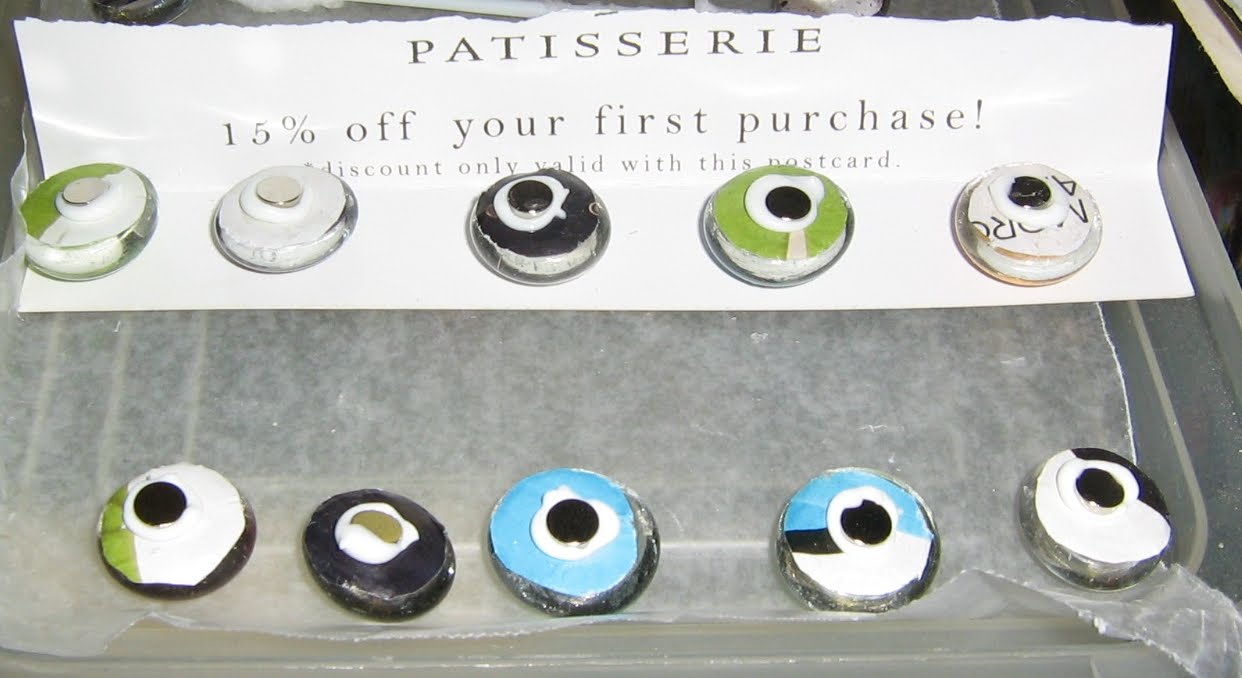
- Place the upside down gem somewhere safe to dry – you will know it is fully dry when you turn it over and it is clear – the images will POP! While they were drying, I divided my sets with swabs so they would not get mixed together.
- After they are dry, add a small dab of CLEAR silicone adhesive (caulk) to the back of each gem. It will look white at first but I know you made sure to read the label before your purchase and you bought the kind that dries clear or “translucent”. In this photo you can see my other very expensive “set separating device” a folded piece of torn junk mail.


- Into each dab of caulk place a magnet. I know it looks a little messy at this point, but trust me, push it down and wiggle it a bit so that the caulk comes up over the top of the sides a little – this will hold it really when when fully dried (or “cured” in caulking language.)
- Let them dry – let them dry really well – let them dry upside down for about two days, even longer if they are the large gems and you have used a bunch o’caulk. You want the caulk to be clear and hard so it will work well and stay in one piece, like any child *smile*.
- Oh, and while they are drying keep them far from your computer, electronics, credit cards, VHS tapes, etc. ANYTHING that would be negatively impacted by magnets. And please, really, keep them widely spaced so they do not kiss before they are dry, so annoying to repair.
- When you are done you will have some unique little pieces of art to display on your refrigerator, office cubicle cabinets, or other magnetic place in your life!

I can’t believe you could concentrate on this project with your back pain! Bravo to you Laurie! I guess you won’t be coming to Chorus rehearsal today. I’m so sad, but understand how much you cannot go at this time. So looking forward to seeing you again when you’re feeling better. Fondly, Ellen
LikeLike
I am taking today slowly and may spring for a car/taxi as I have missed too many rehearsals and classes. Thank you for your kindness. I know you understand how overwhelming immobility can be. See you soon 😘
LikeLike